It's that time of the year when the festive spirit fills the air, and the joy of creating something unique for Christmas becomes a cherished tradition. This year, let's step into a world of coastal elegance and create a Christmas decor that stands out with its understated charm and creativity. I'm excited to share a delightful project with you – decorating oyster shells for a stunning Christmas display.

Step 1: Gather Your Materials
To embark on this creative journey, you'll need:
- Mod Podge (or any decoupage glue)
- Scissors
- Decorative napkins or tissue paper (I found charming Christmas tree designs by Laura Stoddart @laurastoddartillustrator)
- Gold leaf sheets
- A gold or silver pen
- Wire
- Oyster shells (sourced sustainably)
- A container or jug for display such as the ironstone ones in our shop
- Decorative branches Step 2: Prepare Your Shells
Begin by cleaning your oyster shells thoroughly. Ensure they are dry and free from any debris. This step is crucial for a smooth crafting process.

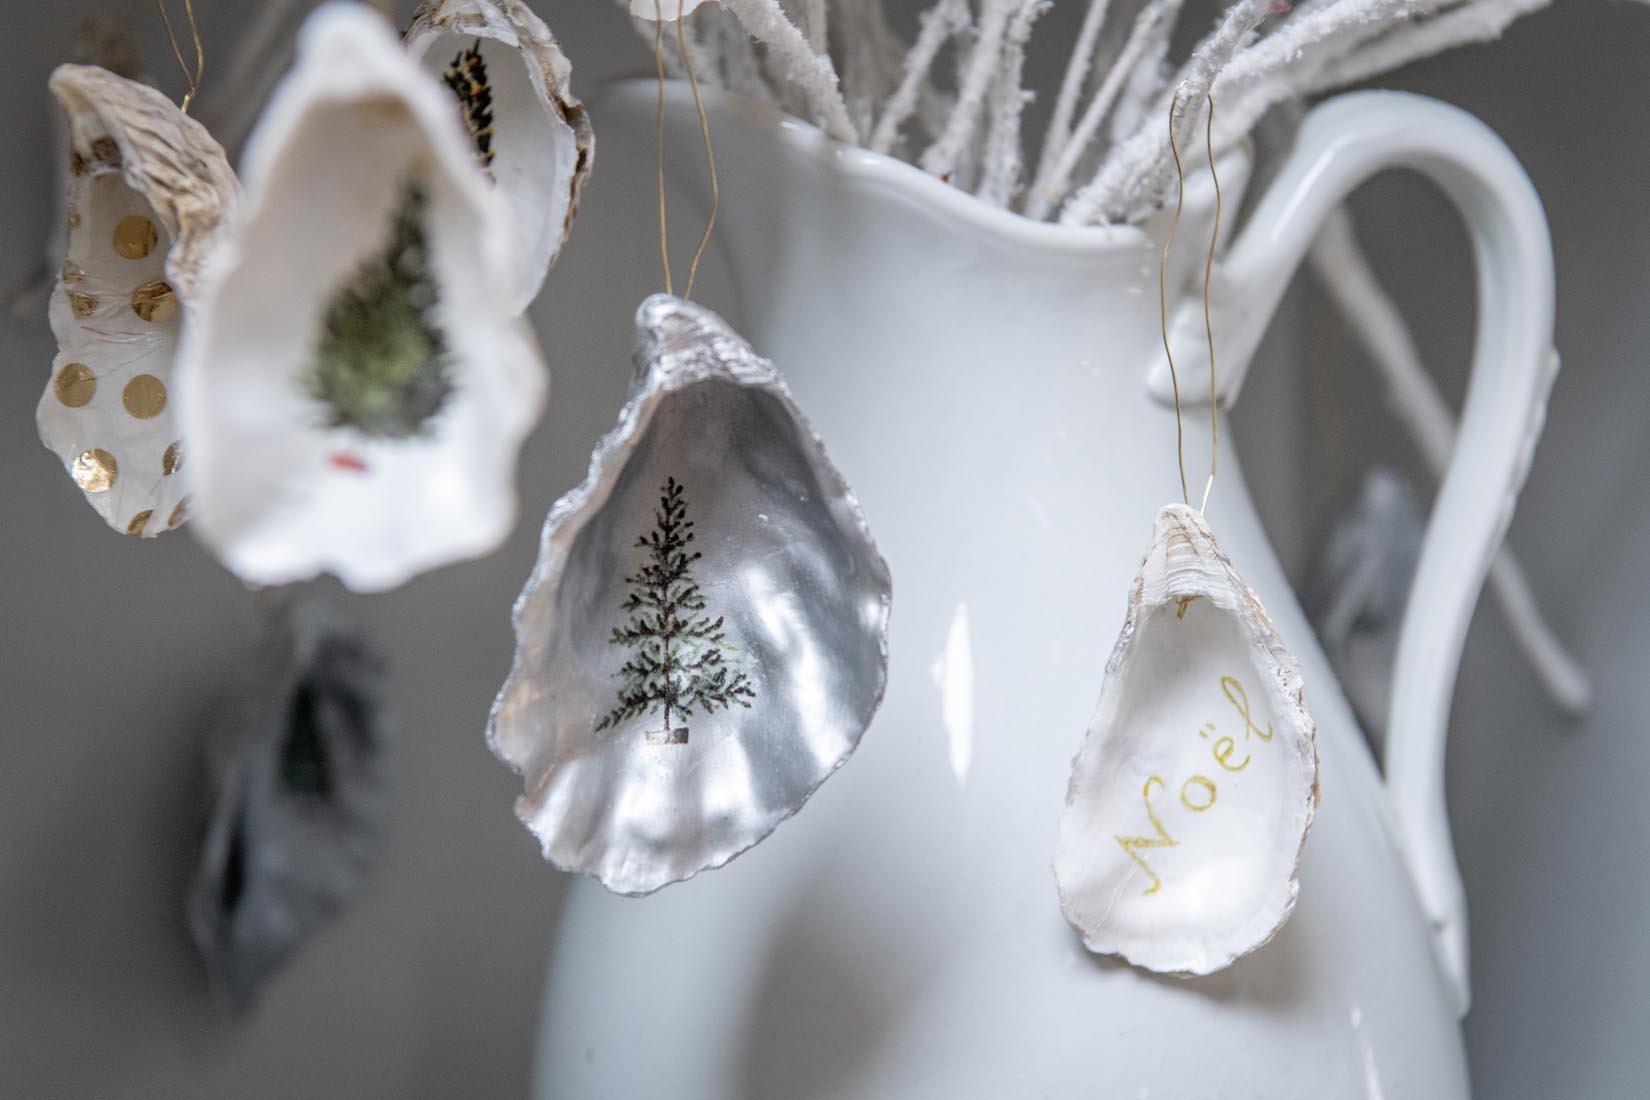
Step 3: Embellish with Gold Leaf, paint or leave white
For an added touch of luxury, apply gold leaf to parts or the whole of the shell. You can cover the edges or create small gold leaf accents. Gently press the gold leaf onto the shell after adding some glue and use a soft brush to remove excess. Or simply paint the shell your favourite colour_ we used silver for a festive look.
Step 4: Cut and Apply Your Designs
Select the designs you love from your napkins or tissue paper. Cut them out carefully, keeping in mind the size of your oyster shells. Apply a thin layer of Mod Podge to the shell, place your cutout design on top, and then seal it with another layer of Mod Podge. Allow it to dry completely.

Step 5: Add Finishing Touches
Once the gold leaf and design is in place, you can use a gold or silver pen to outline or add details to your design. This step enhances the festive look of your shells.You can also add some festive words on some of your pieces.
Step 6: Wire for Hanging
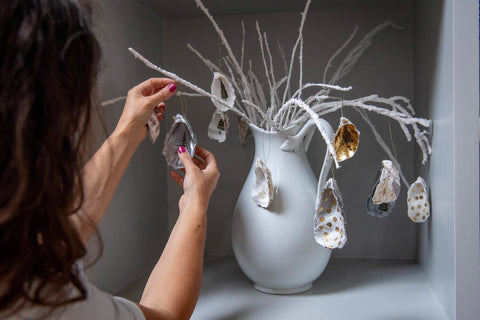
If you wish to hang your shells, attach a small loop of wire after having drilled a hole in the shell with a drimel. The wire ensures flexibility for them as hanging ornaments.
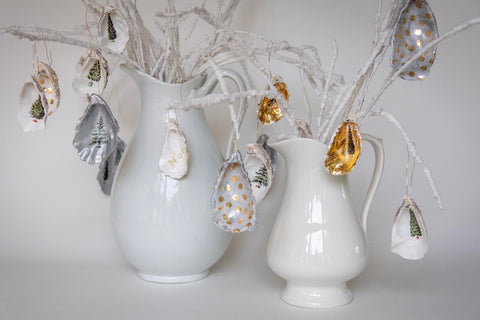
Step 7: Create Your Display
Place your decorated shells in a white ceramic jug or any container that complements your Christmas theme. Arrange the white branches in the jug to add height and texture to your display. The shells can be hung delicately from them.
Step 8: Enjoy Your Coastal Christmas Display
Step back and admire your unique Christmas creation. It's not just a display; it's a conversation starter, a testament to your creativity, and a nod to the serene beauty of the coast during the festive season.
This DIY project is not only an exercise in creativity but also a wonderful way to bring a piece of the seaside into your holiday decor. It's a perfect blend of rustic charm and festive sparkle, creating an atmosphere that's both inviting and intriguing. So, gather your materials, and let's turn oyster shells into a dazzling part of your Christmas celebration!